Table of Contents
ToggleA walk-in shower with a bench isn’t just about accessibility, it’s a practical upgrade that transforms how you use your bathroom. Whether someone needs a safe place to sit while showering, wants a convenient spot for shaving legs, or just likes the flexibility of a perch for kids’ bath time, a shower bench delivers. It also adds resale value. Today’s buyers look for adaptable, spa-like features, and a well-integrated bench checks both boxes. This guide walks through the types, planning considerations, installation basics, and current design trends to help homeowners decide if a walk-in shower with seat makes sense for their space.
Key Takeaways
- A walk-in shower with a bench enhances both accessibility and everyday convenience, reducing fall risk for older adults while providing practical seating for shaving, foot care, and bathing children.
- Built-in tile benches offer a seamless, waterproof design but require proper waterproofing membranes and sloped mortar to prevent leaks, while freestanding and fold-down options provide faster, budget-friendly alternatives.
- When planning a walk-in shower with bench, position the seat 17–19 inches high with at least 30 inches of clear floor space in front, and ensure drainage slope of ¼ inch per foot to prevent water pooling.
- Modern design trends for 2026 favor continuous tile, large-format porcelain slabs, and integrated LED lighting under floating benches to create spa-like aesthetics while maintaining safety and functionality.
- Structural support is critical—anchor blocking to wall studs for built-in benches and use toggle bolts rated for wet locations for fold-down seats to ensure durability under water and weight exposure.
- Large walk-in shower layouts (6×4 feet or bigger) benefit from full-width back-wall benches that serve as both design statements and practical seating, while small showers maximize space with narrow corner benches or fold-up seats.
Why Add a Bench to Your Walk-In Shower?
Safety and accessibility top the list. A built-in or freestanding seat reduces fall risk for older adults, those recovering from injury, or anyone with mobility concerns. Grab bars and a bench often go hand-in-hand in universal-design bathrooms, meeting ADA-inspired guidelines even in residential builds.
Beyond accessibility, benches add everyday convenience. Parents use them for bathing small children without kneeling on tile. Shaving, foot care, and applying lotion all become easier with a stable seat. Athletes appreciate a place to sit and stretch post-workout under hot water.
From a design standpoint, a modern walk-in shower with bench serves as a focal point. Large-format tile on a cantilevered bench, waterfall edges, or contrasting grout lines turn functional seating into architectural detail. And if you’re planning to age in place or sell within a few years, that bench signals thoughtful, inclusive design, something appraisers and buyers notice.
Types of Walk-In Shower Benches
Built-In Tile Benches
A walk-in shower with built-in bench integrates the seat directly into the shower structure during construction or remodel. Framers install blocking between studs, typically 2×6 or 2×8 lumber, to support the cantilevered or corner seat. A mortar bed or cement backer board forms the base, and tile completes the finish.
Pros: Seamless look, fully waterproof when done right, and no moving parts to wear out. You control height (standard is 17–19 inches off the floor), depth (12–18 inches), and tile choice. Many homeowners reference design galleries for tile shower bench ideas that match existing walls or create contrast with mosaic accents.
Cons: Permanent. If you change your mind, removal means re-tiling. Installation requires waterproofing membrane over the bench frame, sloped mortar to direct water away, and careful detailing at seams. Mistakes here lead to leaks behind the wall. Not a beginner project unless you’ve tiled before.
Materials: Cement board (Durock, HardieBacker), waterproofing membrane (Schluter Kerdi, RedGard), thinset, tile, and grout rated for wet areas. Expect to budget $300–$600 in materials for a small to medium bench, excluding tile.
Freestanding and Fold-Down Options
Walk-in shower kits with seat often include molded acrylic or fiberglass benches that ship as part of a one-piece or modular surround. These units install faster than tile and cost less upfront, $800–$2,500 for a complete kit with seat, walls, and base. Brands like Kohler, Sterling, and DreamLine offer models with integrated corner or alcove seats.
Fold-down seats mount to the wall with stainless-steel or nylon brackets. When not in use, they flip up and out of the way, ideal for small walk-in shower with bench layouts where every inch counts. Load ratings vary: look for models rated to 300–500 pounds. Moen and Bobrick make ADA-compliant fold-down seats.
Teak benches and other freestanding options sit on the shower floor. They’re portable, require no installation, and work in rentals or spaces where permanent changes aren’t allowed. Teak naturally resists mold, but any freestanding bench should have drainage slats and rubber feet to prevent trapping water.
Pros: Quick install, budget-friendly, reversible.
Cons: Seams in acrylic kits can harbor mildew if not caulked properly. Fold-downs may not suit those who need constant seating. Freestanding benches slide around and look like add-ons rather than integrated features.
Planning Your Walk-In Shower Bench Layout
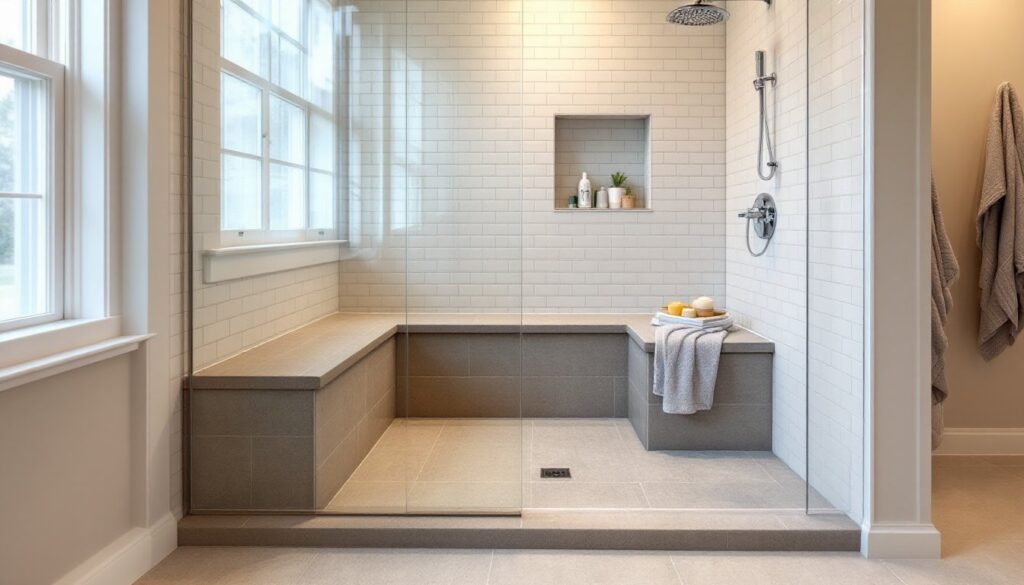
Before swinging a hammer, measure the shower footprint and decide where the bench goes. Corner benches fit snugly in alcove or neo-angle showers, leaving the center open. Sidewall benches run along one wall, common in larger walk-in showers 60 inches or wider. A walk-in shower with bench seat on the back wall works when plumbing is opposite the entry.
Clearances matter. The International Residential Code (IRC) doesn’t mandate shower bench dimensions, but ADA guidelines, often used as best practice, call for a seat 17–19 inches high, 15 inches minimum depth, and 24 inches minimum width. Allow at least 30 inches of clear floor space in front of the bench for transfers and maneuvering.
Structural support is non-negotiable. If you’re building a tile bench, anchor blocking to wall studs. For fold-down seats, hit studs or use toggle bolts rated for wet locations. Never rely on drywall anchors alone, steam and weight will pull them out.
Drainage slope: Tile benches need a slight pitch (about ¼ inch per foot) toward the shower drain so water doesn’t pool. Many pros incorporate a linear drain along the bench front edge for larger walk in shower with bench designs.
Plumbing and controls: Position the showerhead and mixing valve so users on the bench can reach controls without standing. A handheld showerhead on a slide bar is almost mandatory, mount the bar 38–48 inches off the floor for seated and standing use.
Permit check: If you’re moving walls, changing drain location, or altering electrical (adding a steam generator, for example), most jurisdictions require a permit. A simple bench addition in an existing enclosure usually doesn’t, but verify with your local building department.
Installing a Shower Bench: Step-by-Step Overview
This outline covers a built-in tile bench in a walk-in shower under construction or during a gut remodel. If you’re retrofitting, steps will vary.
1. Frame and block the bench. Install horizontal blocking between studs at the desired seat height. Use 2×6 or 2×8 pressure-treated or exterior-grade lumber. Secure with 3-inch deck screws or nails into studs every 16 inches. For a cantilevered bench, add vertical supports underneath if code or span tables require it.
2. Install cement backer board. Cut and screw ½-inch cement board over the blocking and shower walls per manufacturer spacing (typically every 8 inches on studs, 6 inches on edges). Tape seams with alkali-resistant mesh tape.
3. Apply waterproofing membrane. Roll or trowel liquid membrane (RedGard) or apply sheet membrane (Schluter Kerdi) over all surfaces, including the bench top, front, and sides. Overlap seams by 2 inches and ensure continuity with the shower pan membrane. This step is critical, any gap invites water into the wall cavity.
4. Build the mortar bed (optional). For extra slope and strength, some installers float a thin mortar bed on the bench top using deck mud (sand-cement mix). Slope it ¼ inch per foot toward the drain. Let cure 24–48 hours.
5. Lay tile. Start with the bench top, then sides, then surrounding walls. Use large-format tile (12×24 inches or bigger) for a modern look with fewer grout lines, or classic subway tile for a timeless feel. Many design-focused platforms showcase walk in shower ideas with bench using textured stone, porcelain that mimics wood, or mosaic accents on the bench face.
6. Grout and seal. After tile sets (24 hours), grout with epoxy or urethane grout for maximum stain and mildew resistance. Seal natural stone and grout lines with a penetrating sealer. Let cure per product instructions before use, usually 72 hours.
PPE: Wear safety glasses when cutting tile, a dust mask or respirator when mixing mortar or cutting cement board, and rubber gloves when handling membranes and grout.
Tool list:
- Drill/driver and bits
- Circular saw or reciprocating saw
- Tile saw (wet saw preferred) or angle grinder with diamond blade
- Notched trowel (¼×¼-inch or ⅜×⅜-inch depending on tile)
- Grout float
- Level (2-foot and 4-foot)
- Tape measure and pencil
- Utility knife
Alternatives: If a tile build feels over your head, consider walk-in shower kits with seat. They ship with walls, base, and integrated bench, and most install in a weekend with basic carpentry skills.
Design Trends and Style Tips for 2026
Continuous tile from floor to bench to ceiling creates a cohesive, spa-like look. Large-format porcelain slabs (up to 48×120 inches) minimize grout lines and make small bathrooms feel larger. Homeowners browsing design inspiration will see walk-in shower with seat and glass doors dominating modern remodels, the transparency keeps sightlines open.
Contrasting bench faces remain popular. A bench clad in hexagon mosaic or zellige tile against neutral walls adds texture without overwhelming the space. Wood-look porcelain on the bench top paired with matte white walls hits the warm-minimalist trend.
Integrated lighting: LED strip lights under a floating tile bench or recessed niches flanking the seat create ambiance and improve safety. Use wet-location-rated fixtures and consult an electrician, mixing water and electricity requires careful code compliance (NEC Article 410).
Niche storage next to or above the bench keeps shampoo and soap within arm’s reach. Tile niches with a waterproof backing avoid the clutter of corner caddies.
Walk-in shower with seat ideas for 2026 emphasize sustainability: recycled glass tile, low-flow fixtures, and benches built with reclaimed stone. VOC-free grouts and sealers improve indoor air quality, important in a steamy, enclosed space.
For a small walk-in shower with bench, fold-up seats or narrow corner benches (10–12 inches deep) preserve floor space. In a large walk in shower with bench, think 6×4 feet or bigger, a full-width bench along the back wall doubles as a design statement and practical seating for two.
Hardware and fixtures: Matte black, brushed gold, and mixed metals continue trending. Pair a handheld showerhead on a slide bar with a rain head overhead for flexibility. Thermostatic valves prevent scalding, especially important if kids or elderly users sit on the bench.