Table of Contents
ToggleInstalling a Ring doorbell isn’t as complicated as it might seem at first glance. Whether you’re upgrading from an old wired doorbell or mounting one on a blank wall, the process takes about an hour and requires minimal tools. The key is understanding which Ring model you’ve got, battery-powered or hardwired, and prepping your doorway properly before you start drilling. This guide walks through everything from removing your old doorbell to setting up the app, so you can get your new smart doorbell up and running without hiring an electrician.
Key Takeaways
- Installing a Ring doorbell takes approximately one hour and requires minimal tools like a Phillips-head screwdriver, drill, level, and wire strippers, making it achievable for most homeowners.
- Before installation, verify your existing doorbell transformer outputs 16-24V AC and ensure your Wi-Fi reaches your front door with at least 2 Mbps upload speed to avoid installation delays.
- How to install Ring doorbell wired models involves turning off power, disconnecting old wires, attaching the mounting bracket level, and connecting wires to terminals, while battery-powered options skip wiring entirely and require only a fully charged battery.
- After physical installation, set up your Ring doorbell through the mobile app by scanning the QR code, connecting to your home Wi-Fi, and configuring motion detection zones to minimize false alerts.
- Battery-powered Ring doorbells last 4-6 weeks in high-traffic areas, while wired models provide continuous charging; if your mechanical chime doesn’t work, install a Ring Chime Kit adapter to prevent power draw issues.
- Common troubleshooting steps include checking transformer voltage with a multimeter, ensuring 2.4 GHz Wi-Fi connectivity, cleaning the camera lens for motion detection accuracy, and consulting a licensed electrician for complex electrical work.
What You’ll Need Before Starting Your Ring Doorbell Installation
Before you crack open the Ring box, gather your tools and confirm what you’re working with. Most Ring doorbells come with a basic mounting kit, but you’ll need a few extras depending on your installation type.
Tools required:
- Phillips-head screwdriver (most important, everything hinges on this)
- Drill with bits (if mounting to brick, stucco, or siding)
- Level (a small torpedo level works fine)
- Wire strippers (for wired installations)
- Voltage tester or multimeter (to check existing doorbell wiring)
- Pencil for marking holes
Materials you might need:
- Anchors and screws (often included, but check if they match your siding material)
- Wire nuts (if connecting to existing doorbell wiring)
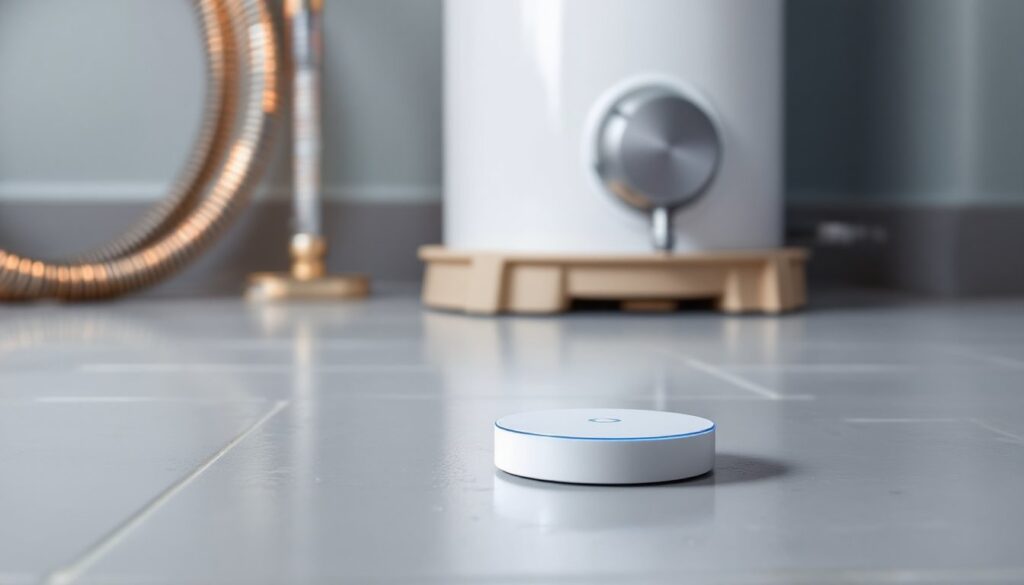
- Doorbell transformer (Ring doorbells need 16-24V AC: older systems sometimes run 10V and won’t work)
- Fully charged battery (for battery-powered models, charge it overnight before installation)
Check your existing doorbell transformer voltage before you do anything else. It’s usually mounted near your electrical panel or in the basement. If it’s under 16V, you’ll need to replace it, this is a straightforward swap, but if you’re uncomfortable working around your breaker box, call an electrician. Most jurisdictions don’t require a permit for low-voltage doorbell work, but always verify local codes.
One more thing: make sure your Wi-Fi reaches your front door. Ring doorbells need a solid connection (at least 2 Mbps upload speed). Test it with your phone before mounting anything.
Preparing Your Doorway and Removing Your Old Doorbell
Prep work matters more than the actual installation. A crooked doorbell or one mounted on crumbling mortar won’t last.
For wired doorbell replacement:
- Turn off power at the breaker. Doorbell voltage won’t kill you, but it’s good practice. Use a voltage tester on the existing wires to confirm power’s off.
- Remove the old doorbell. Most units have a faceplate that pops off, then two screws holding the base to the wall. Pull it gently away from the wall, you’ll see two thin wires attached to screw terminals.
- Disconnect the wires. Loosen the terminal screws and pull the wires free. Don’t let them slip back into the wall, wrap them around a pencil or tape them to the siding temporarily.
- Inspect the wire condition. If the insulation is cracked or the copper is corroded, strip back half an inch of fresh wire. You need clean contact points.
- Check the mounting surface. If your old doorbell left a larger footprint than the Ring baseplate, you might have exposed screw holes or paint lines. Fill holes with exterior-grade wood filler (for wood siding) or patching compound (for stucco). Let it cure, then touch up with exterior paint.
For new installations (no existing doorbell):
You’ll mount the doorbell wherever you want it, ideally 48 inches from the ground (chest height for most people). Use a level to mark your screw holes, then drill pilot holes. For wood siding, drill straight in with a bit slightly smaller than your screws. For brick or stucco, use a masonry bit and plastic anchors. For vinyl siding, avoid drilling through the face, instead, use a siding mounting block or drill into the underlying sheathing.
Many home improvement guides recommend using a mounting wedge if your door is recessed or angled. Ring sells angled wedges that tilt the camera view toward the street instead of pointing at the underside of your porch roof.
Installing Your Ring Doorbell: Wired vs. Battery-Powered Options
Ring offers both wired and battery-powered models. The installation process diverges here, so follow the path that matches your doorbell.
Wired Ring Doorbell Installation Steps
Wired models connect to your existing doorbell wiring and continuously charge an internal battery (on newer models) or run directly off transformer power. This setup keeps the battery topped off and allows continuous video recording if you have a Ring Protect subscription.
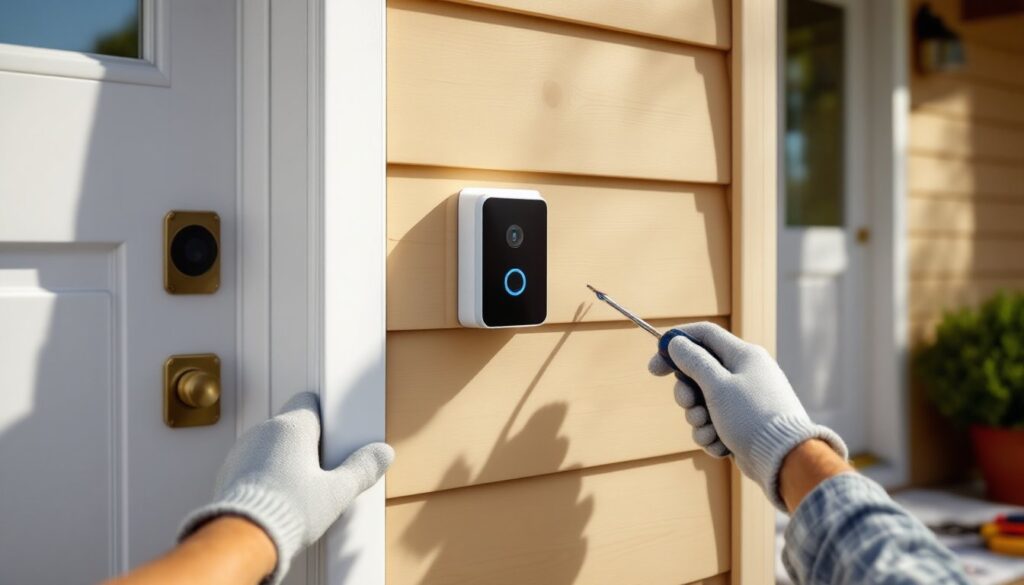
- Attach the mounting bracket. Line up the bracket with your existing wire holes (or new pilot holes). Thread the doorbell wires through the center opening in the bracket. Secure the bracket with the included screws, make sure it’s level before tightening completely.
- Connect the wires. Loosen the two terminal screws on the back of the Ring doorbell. Loop each wire clockwise around a terminal (doesn’t matter which wire goes where, doorbell circuits aren’t polarized). Tighten the screws firmly. Give each wire a gentle tug to confirm it’s seated.
- Snap the doorbell onto the bracket. Align the doorbell with the bracket tabs and press until you hear a click. Some models use a security screw at the bottom, hand-tighten it with the included screwdriver bit.
- Restore power at the breaker. The Ring should light up within a few seconds. If it doesn’t, double-check your transformer voltage and wire connections.
If your old mechanical chime doesn’t work after installation, you might need a Ring Chime Kit (a small adapter that installs inside your chime box). This prevents interference on certain transformer types. Detailed wiring diagrams show where to place the adapter based on your chime model.
Battery-Powered Ring Doorbell Installation Steps
Battery-powered models skip the wiring entirely. They’re ideal for rentals, homes without existing doorbell wiring, or installations on gates and outbuildings.
- Charge the battery fully before starting. Plug the included USB cable into the battery (or the entire doorbell, depending on model) and let it charge for 5-10 hours. The indicator light turns green when ready.
- Attach the mounting bracket. Use a level to position the bracket, mark your screw holes, and drill pilot holes if needed. Secure the bracket with screws and anchors appropriate for your surface.
- Insert the battery. Slide the battery into the bottom or back of the doorbell until it clicks. Some models require you to press a release tab first.
- Snap the doorbell onto the bracket. Align and press until it seats. Tighten the security screw if your model has one.
- Test the button. Press the doorbell button, you should hear a tone and see the LED ring light up. If it doesn’t respond, pull the doorbell off and reseat the battery.
Battery life varies wildly based on activity. In high-traffic areas, expect to recharge every 4-6 weeks. In quiet spots, batteries can last 6 months. Ring sends low-battery alerts through the app, so you’ll have a week’s warning before it dies.
If you’re adding a doorbell to a location that lacks any wiring, consider picking up a Ring Chime plug-in unit. It plugs into an indoor outlet and chimes when someone presses the doorbell, no wiring required.
Setting Up Your Ring Doorbell Through the Mobile App
The physical installation is only half the job. Setting up the Ring app connects your doorbell to Wi-Fi and enables all the smart features, motion alerts, live view, and cloud recording (with a subscription).
- Download the Ring app (iOS or Android). Create an account or log in if you already have one.
- Tap “Set Up a Device” on the home screen. Select “Doorbells,” then choose your specific Ring model from the list.
- Scan the QR code on the back of your doorbell or on the Quick Start Guide. This links the device to your account.
- Put the doorbell in setup mode. Press and hold the orange button on the back or side of the unit for 10-15 seconds. The light on the front will start spinning or flashing, this means it’s broadcasting a temporary Wi-Fi network.
- Connect your phone to the Ring’s setup network. The app will prompt you to go to your phone’s Wi-Fi settings and select a network named “Ring-XXXX.” Do this, then return to the Ring app.
- Select your home Wi-Fi network and enter the password. The doorbell will disconnect from the setup network and connect to your home network. This takes 30-60 seconds. The light will turn solid blue when connected.
- Name your doorbell (“Front Door,” “Side Entrance,” etc.) and set your address. This helps Ring provide accurate motion zones and package detection.
- Test the doorbell. Press the button and confirm you receive a notification on your phone. Check the live view to see the camera angle, adjust the doorbell position now if it’s pointing too high or too low.
If you’re setting up motion detection, spend a few minutes customizing motion zones. The default settings often trigger on passing cars or neighbors walking by. Draw zones that cover your porch and walkway, but exclude the street and sidewalk. This cuts down on false alerts.
Ring doorbells work with Alexa-enabled devices. If you have an Echo Show or Echo Dot, link your Ring account in the Alexa app. You’ll be able to say, “Alexa, show the front door,” and see live video on your smart display.
Troubleshooting Common Ring Doorbell Installation Issues
Even straightforward installations hit snags. Here’s how to handle the most common problems.
Doorbell won’t power on (wired models):
- Check transformer voltage with a multimeter. It should read 16-24V AC. If it’s lower, replace the transformer.
- Verify wires are securely attached to the terminals and making good contact.
- Confirm power is on at the breaker.
- Test the existing chime by shorting the two wires together (with power on). If the chime rings, your wiring is good and the problem is likely with the Ring unit itself.
Doorbell won’t connect to Wi-Fi:
- Move your router closer to the front door, or install a Wi-Fi extender. Ring doorbells need a strong signal, at least 2 bars in the app’s network strength meter.
- Restart your router and try the setup process again.
- Check that your Wi-Fi network is 2.4 GHz, not 5 GHz. Most Ring doorbells only support 2.4 GHz networks.
- Disable MAC address filtering or add the Ring’s MAC address to your router’s whitelist (found in the Ring app under Device Settings > Device Health).
Motion detection isn’t working:
- Confirm motion alerts are enabled in the app (Device Settings > Motion Settings).
- Adjust motion sensitivity. The default setting is often too low in open areas or too high in crowded spots.
- Redraw motion zones to exclude areas that generate false alerts but include zones where you want detection.
- Clean the camera lens, dust and spiderwebs reduce motion detection accuracy.
Mechanical chime doesn’t ring (wired models):
- Install a Ring Chime Kit inside your chime box. This small adapter prevents power draw issues that silence mechanical chimes.
- Verify your chime is compatible. Very old or unusual chimes sometimes need a different doorbell transformer or won’t work with smart doorbells at all.
Battery drains too fast:
- Reduce motion sensitivity and shrink motion zones to decrease the number of activations.
- Lower video quality in the app (Device Settings > Video Settings). High-definition recording drains batteries faster.
- Check Wi-Fi signal strength. Weak signals force the doorbell to work harder to maintain connection, killing batteries quicker.
- In cold climates (below 40°F), battery life drops significantly. Consider hardwiring the doorbell or adding a solar charger accessory.
For more complex electrical issues or if you’re uncomfortable working with even low-voltage wiring, consult a licensed electrician. Most charge $100-$150 for a doorbell installation, which includes verifying your transformer and troubleshooting connection problems. Many DIY project platforms also offer community forums where experienced installers share solutions to unusual wiring configurations and older home setups.
Once everything’s working, check the app settings for firmware updates. Ring pushes updates periodically to improve performance and add features, keeping your doorbell current ensures you get the best experience.